Aug 8, 2015 | Egg Free, Entrees, Nut Free
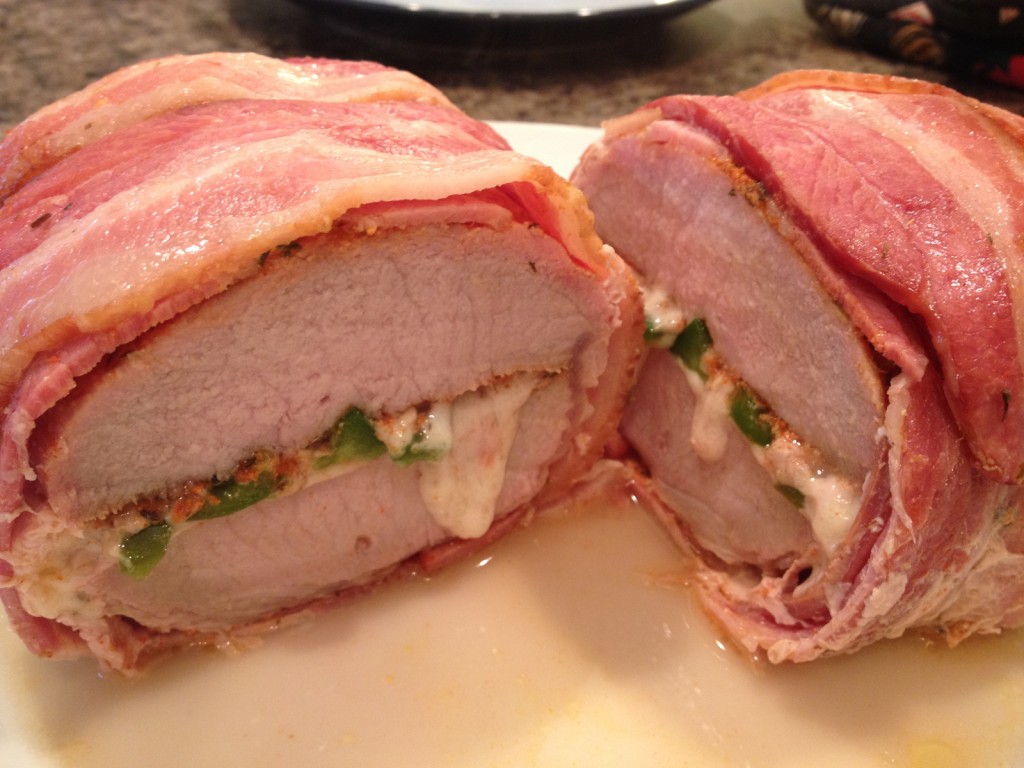
While the bacon may not look cooked, that’s not the case since it was wrapped in parchment paper to keep the loaf together. This also helped keep the juices from just evaporating.
I’m not exactly sure why I need to keep wrapping stuff in bacon. Whether it’s a meatloaf or a jalapeno, everything really is better with bacon. Ok in my case, bacon and cheese!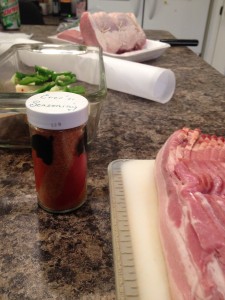
Pork roasts were never really served in my house when I was younger. Sure we did pork chops – battered and fried, maybe some milk gravy. But pork roasts were just not done. Then I got diagnosed and started looking at other types of foods to fill me up, because we all know GF is Not Taste Free. And doing a pork roast fit the bill.
My first variation of a simple pork roast was my Caribbean Jerk Roast. But recently I saw another Celiac blogger talking about bacon-wrapped loaf and I had to experiment. And boy was this experiment tasty!
I made a sandwich with Pepper Jack cheese and fresh jalapenos between pork “buns” wrapped in bacon … it was awesome!
Cheesy Pork Roll
 1 pork roast
about 150 g Pepper Jack cheese
1 regular package bacon
2-3 jalapenos or other peppers
Cajun seasoning
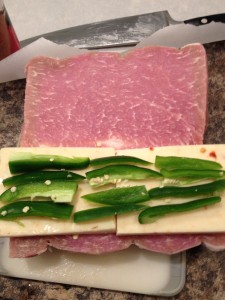
- Preheat your convection to 375 degrees while you start slicing your jalapenos into strips, cheese into thin blocks (about a quarter inch thick) and your roast into what looks like a hoagie.
- Place your cheese in the middle and then your peppers on the top of the cheese.
- Fold your pork roll together and pat the roll down with your Cajun Spices.
- Wrap your bacon around the pork roast and then wrap the whole roast with parchment paper before putting it into a meatloaf pan.
- Cook the roast for about 35-40 minutes or until your meat thermometer says mid rare to medium for pork. Remember it will cook up for a bit longer after you take it out.
Jul 18, 2015 | Egg Free, Nut Free, Side Dishes
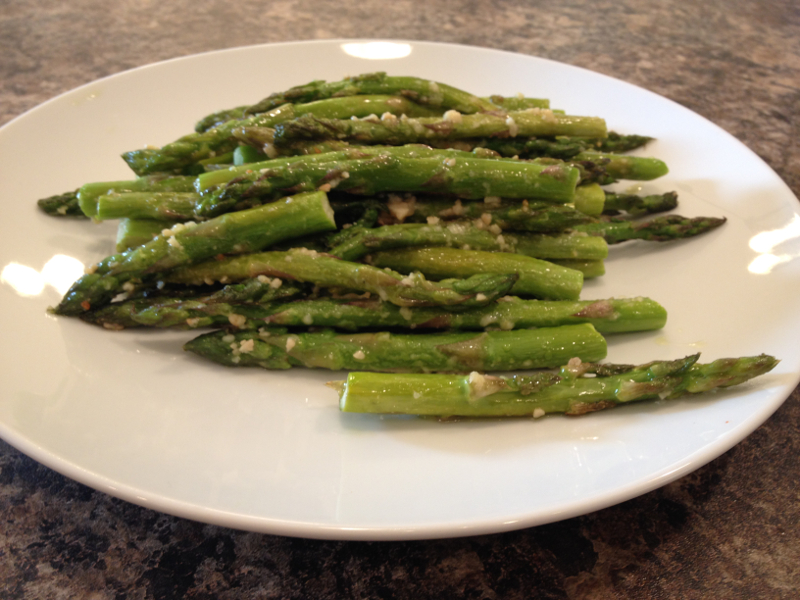 A few years before Celiac Diagnosis, I was diagnosed with Non-Alcoholic Fatty Liver Disease. It was because of that diagnosis that I was further diagnosed with Celiac’s. Now I have to watch not only my lack of gluten consumption, but also my fat intake.
So I started at that time looking for recipes that were flavourful and low fat. I found a recipe for baked asparagus and then altered it a bit. OK, so I added a bit of fat back in with the Parmesan cheese but it was so much better than the lemon. Here you go – remember Gluten Free is not Taste Free!
Garlic-Parm Asparagus
1 bunch asparagus
2 tbsp minced garlic
2 tbsp olive oil
2 tbsp Parmesan cheese
- Line a cookie sheet with aluminum foil while your oven preheats to 350 degrees.
- Wash your asparagus. After washing bend each stalk until it breaks, then throw out the stalk end keeping the bushy end. These are the pieces you want, below the break would be bitter.
- Place your asparagus on the sheet in rows.
- Mix all of your other ingredients together and then brush the paste over the stalks.
- Cook for about 10 minutes turning at the five minute mark. If you’re not using convection cook for about 12 minutes.
Jun 23, 2015 | Dairy Free, Egg Free, Entrees, Nut Free
There are times that I question the methods by which we cook. For instance, in the height of the heat, we stand outside and grill steaks over hot coals. And I understand that ice cream is a year round treat, but really in the middle of winter, you’re gonna eat some food that makes you just as cold inside as it is outside?
So it is with great trepidation that I offer up this recipe in the middle of the summer using a slow cooker. That said, I believe this sauce could easily be used on the stove-top to make it a much quicker meal. Or if you like the idea of the slow cooker, this would likely work fantastic with a nice pork roast and shredding the meat over rice. The proof is in the the pork that Gluten Free is Not Taste Free!
Slow Cooker Honey Garlic Pork Chops
1 cup (250 ml) GF Soya Sauce
1/2 cup (125 ml) ketchup
1 cup (250 ml) honey
1/4 cup (50 g) minced garlic
1 tbsp (15 g) cilantro
1 tbsp (15 g) oregano
2 tbsp (30 g) pepper flakes
Pork Chops – about 8-10 would be covered by this sauce.
- Mix all of the ingredients up to the pork chops. Whisk it together well.
- Using your fresh (not frozen) pork chops, cover the bottom of your slow cooker. And then cover with your sauce.
- The biggest issue with this method is that you can easily overcook your pork chops. On high for like an hour, two at max should be good. If you want to do slower, low for about four hours max and even then your chops may be over done.
Note: I will be trying this again with a roast and we’ll see how that turns out! I’ll let you know!
Jun 15, 2015 | Dairy Free, Egg Free, Entrees, Nut Free
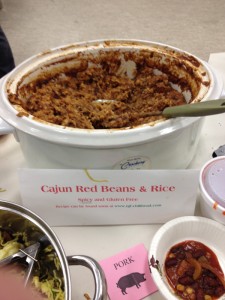
I made this for a Cultural Potluck; had to rep for the States and be GF! I have to say it was a hit!
My wife teases me that I’m from the South (of the United States). I have a ton of relatives in the Georgia, Florida and Alabama area as well as a bunch of friends scattered throughout. I was born in Florida and lived in the Atlanta area and throughout the South for about 15 years, However, I don’t hunt, fish or eat collard greens. The last time I drank Sweet Tea on an irregular basis was more than 16 years ago.
Despite all that, there is one dialect (if you will) of Southern cuisine that I love – Cajun/Creole food. If you want to know the difference between Cajun and Creole check out this link. For the purpose of my site, I guess I like Cajun food more. And a lot of that love of the food was the short time I lived close to New Orleans and Emeril Lagasse (more the latter than the former).
Now Cajun food was not a staple in my house as I was growing up. My folks liked “beans” as they called it. Think a big pot of kidney beans cooked all day with onions and then finished with corn bread – I hated it. Might be part of the reason to this day why I will avoid beans on a normal basis; the same can be said about ham. Sorry Mom! But when I was old enough and we were close enough to someplace that had a Popeye’s Chicken, I learned of the joys of almost-Cajun. Then I had actual Cajun food in New Orleans and I was hooked.
Enter one of the OG Food Network shows featuring Emeril. Bam! and I was intrigued enough to try to figure out how to make this Cajun staple! I still have a number of cookbooks from him and thanks to him, I learned the basis for what grew into my version. And finding regular ingredients for this recipe were much easier SOB (South of the Border). But here it goes …
Red Beans & Rice
1 lb. (450 g) dried red beans (kidney beans will work if you can’t find red beans)
2 large red onions
1 lb. (450 g) andouille (I had to use GF Garlic sausage as andouille is hard to find in Canada)
1 lb. (450 g) ham hock
2-2.5 quarts (2 l) chicken stock
1/4 cup (50 g) Cajun Seasoning
2 bay leaves
1 tbsp (15 ml) Olive oil
Rice (between 2-4 cups cooked)
- Rinse the beans and discard any pebbles or broken beans. Put enough cold water to cover the beans plus about two inches and let them soak overnight. Or bring them to a boil, cook for two minutes and then let them stand for an hour.
- Sauté your diced onions and sausage with olive oil and the spices. Put this mixture as well as the beans in a crockpot with about 1 quart of stock and 4 cups of water.
- I let the beans simmer over night and usually add another quart of stock in the morning. If you give them about 24 hours they should be good. If you can’t wait that long, simmer the beans uncovered for about two hours.
- Wash the rice in water. Put 2 cups of water for each cup of rice into a microwave container with the rice. Microwave on high for 10 minutes covered with cling wrap. Lift cover, stir rice and recover. Microwave on medium for 10 minutes. Let stand in the microwave for ten minutes. Take it out, uncover and set aside.
- When you think the beans are done, remove the ham hock, debone it and add the meat back to the pot. Take out the bay leaves and then blend the beans to give the beans a creamy texture.
- Pour over rice and enjoy.
Jun 10, 2015 | Desserts, Egg Free, Nut Free
I have a confession to make. When it comes to desserts, I usually forgo all others in favour of the flavour that has had me enthralled since I was a babe. In fact, that flavour is one of my four basic food groups – chocolate, cheese, chicken and chilies … cha, cha, cha!
But if anything can make me cha, cha, change my mind – it’s an apple crisp. In fact, if I can’t have chocolate, I gravitate towards anything with apple as a backup. Unfortunately, apple pie is currently out of my bailiwick – post CD, so the next best thing, or the better thing, is an apple crisp.
My mother loves apple crisps but never had a recipe. On the other hand, my mother-in-law has a good recipe that I tinkered with and made my own. That’s where some of the best stuff comes from – I should know, my wife came from her too! That said I don’t know who she got it from, so my mother-in-law is getting all the credit!
At any rate, this recipe is relatively simple. I like using Granny Smith apples, because I like the tartness. And using maple syrup gives you a bit more sweetness.
It can be glutenized if you must. But as my new motto is #GFNotTasteFree, why do you need to bow to others misconceptions? Make it so you can eat it and let everyone else figure out that it rocks!
Mama Jan’s Apple Crisp Redux
4 large Granny Smith apples
1/3 cup maple syrup
about a cup GF flour
1/2 tsp cinnamon
1/2 cup butter
3/4 cup brown sugar
1/2 cup GF certified oats
- In a saucepan, put your syrup, 2 tbsp flour, cinnamon and 2 tbsp butter to make a sauce. Start your oven pre-heating to 350 degrees.
- As the sauce cooks long enough to melt the butter and mix the ingredients, de-core and dice your apples into chunks with the peels still on.
- Pour the sauce over the apples in a 9″x9″ pan.
- Mix the brown sugar, 3/4 cups flour, the oats and the rest of the butter to make a crumble to put on top of your apple mix.
- Cook for about 25-30 minutes in a convection oven (about 35-40 in a non-convection) or until the crumble starts to brown and the sauce bubbles up to the top.
- Test a bit of the apple to ensure done-ness. If necessary cover it with aluminum foil to finish cooking it so that the crumble doesn’t burn.
Jun 1, 2015 | Egg Free, Nut Free, Side Dishes
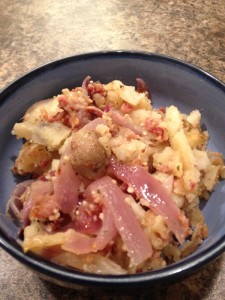
A little Pepper Jack and you’re on your way!
Over the years, I’ve had a love/hate relationship with grills in general. I’ve never had a real good one and have only had real good success with gas grills since you can very easily regulate the heat. So when I saw a recipe recently for foil pouch potatoes I was intrigued. But what intrigued me is that you can cook them typically in either the oven or the grill – who knew?!
Yep, you can crawl through the web and find tons and tons of foil potato pouches to be done and obviously those tons of people knew! So what makes this one different you say?
Well for starter’s it’s GF of course! And secondly it’s got that Spicy flavour explosion thing goin! So let’s not dally – here’s my version!
Foiled Again Potatoes
4-6 medium potatoes
1 red onion
1/2 cup (120 g) pre-cooked bacon bits
2 tbsp (30g) Lowry’s Seasoning Salt
2 tbsp (30 g) minced garlic
1-2 tbsp (15-30 g) red pepper flakes
1 tbsp (15 g) oregano
- Slice your potatoes into discs about 1/4 to 1/2 inch thick and then julienne your red onions.
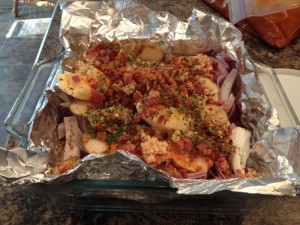
- Create a pouch out of aluminum foil or cheat and use a aluminum foil roasting pan that you cover with foil.
- Cube your butter or scoop it into the foil in various places. Add all of your spices and bacon in – also spread out.
- Close your pouch or cover your pan. Your oven or grill should have been pre-heating by now to 375 degrees.
- Grilled or baked it should be around 45 minutes. But be cautious and check it at about 30 just in case!
- Once they are done cooking serve with some shredded Pepper Jack cheese and some diced green onions as well.


 1 pork roast