Aug 17, 2014 | Dairy Free, Egg Free, Entrees, Nut Free, Sauces & Seasonings
Beyond the dough, there are two other main components of pizza – your sauce and your toppings. If you’ve got two out of three down pat, then the toppings should be a piece of GF pizza pie! And I have it on good authority that my sauce is one of the best things about my pizza. So here’s the recipe for your taste buds’ pleasure!
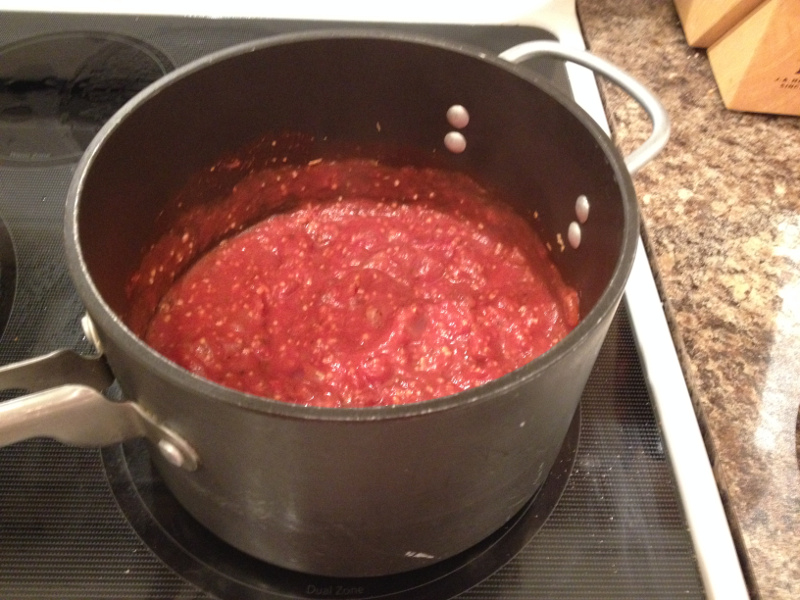
Bill’s Pizza Sauce
1 can tomato sauce
1 can tomato paste
1 large red onion
2 tomatoes
2 tbsp (28 g) minced garlic
1 tbsp (15 g) oregano
1 tbsp (15 g) pepper flakes
2 tsp (10 g) basil
1 tsp (5 g) parsley
1 tsp (5 g) marjoram
- Dice all the veggies and add everything except the tomato sauce and paste to a saucepan with a little olive oil. Cook on medium high until the onions are translucent and soft.
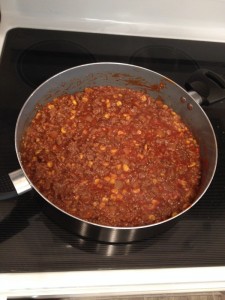
- Add the sauce and paste, stir and continue to cook on medium for about an hour or so. Add about a quarter cup of water to thin out the sauce a bit.
For Spaghetti sauce, use two cans of tomato sauce and add ground beef or ground Italian sausage. Serve over GF pasta of your choice!
Aug 17, 2014 | Baking, Egg Free, Entrees, Nut Free
Everyone loves pizza! Unfortunately, the best pizza dough recipes out there (either online or in restaurants) typically call for high gluten flour, mainly due to gluten being the best binder for the dough. And since most of us have had to cut gluten out altogether, then that doesn’t work.
So many of you have probably tried the GF pizza options that are out there. And like me, if you’ve ever had a good thick pizza crust, then you have been sadly disappointed in the options that are out there. Before I was diagnosed, I had a really good crust recipe that was light and airy with a lot of flavour. I tried it out recently with GF flour and it at least produced a thicker crust than those other paper thin options. I will continue to experiment and try to pinpoint improvements and other options.
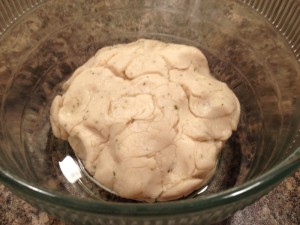
Pizza Crust
3 cups (675 g) GF flour with Xanthan Gum
1/2 cup (120 g) Parmesan cheese
1 tbsp (15 g) oregano
3 tbsp (45 g) sugar
1 tsp (5 g) salt
2 packages active dry yeast
1 cup (250 ml) milk
1/2 cup (125 ml) water
1/4 cup (63 g) butter
olive oil
- Combine about 2 1/2 cups of flour with the other dry ingredients up to the yeast, mixing well.
- In a small pot, bring the rest of the ingredients up to a temperature of 120 degrees. That it just about before it boils but to be certain, use a candy thermometer to verify the temperature.
- Slowly pour the hot milk, water and butter into the flour mixture and mix together until it starts to become sticky. Pour the mixture onto a floured countertop and then slowly add in a little bit of flour until the mixture seems more like a small ball than a small puddle. Don’t add too much flour because your dough will be very heavy then.
- Preheat your pizza stone in the oven at 450 degrees.
- Basically when you start the dough it will be very rough and tend to want to fall apart since there is no gluten to help bind it. What you want to do is knead your dough and ensure that all the ingredients are mixed well.
- To knead your dough, put both hands on the ball and push forward with your palms like you were almost trying to flatten out the end of the ball. Fold the mixture back over the flattened part so that it’s like a ball again and repeat. Each time you repeat this make sure that you turn the dough so you are not just flattening the same side each time. A tip on keeping the dough from sticking to your fingers and the counter is to keep the area dusted with flour.
- Pinch off a small portion of it about half the size of an egg. Using your fingers spread the dough into a small disc rotating it until it is thin in the middle. If you can do this without actually creating a hole in the dough and you can see light through the thin membrane then your dough to proof.
- Unfortunately your dough will not rise that much considering the lack of gluten. That said, put the dough ball in a oiled bowl and let it proof for about 15-20 minutes.
- Take your dough ball and spread it out carefully on the stone. Make a pizza shape and then put it in the oven for about five minutes without the toppings.
- Flip your dough, dress it and let it cook for another 7-10 minutes. The dough will look a little dark once you flip it, but this will help for the dough to cook throughout after you load your pizza with toppings.
Aug 14, 2014 | Egg Free, Entrees, Nut Free
Full Meal Deal Burritos
This recipe is actually a two-fer. A long time ago (about 15 years ago), in a galaxy far, far away (Roswell, GA that is), my wife and I were newlywed and living on our own. Though my wife is originally from Canada, she liked the South of the Border stuff – just a little Anglicized. So she introduced me to her recipe for burritos.
And from there as I normally did, I altered it a tad. So in this recipe post, you will get her “altered” recipe and my spicier version. I’m sure you’re all aware by now that I typically cook two meals when I cook dinner for the family – one for my love and my kids, and one spicy version for me! In this particular recipe, we usually use about 1.5 pounds of hamburger and accompanying ingredients, which I divide up after cooking. So the recipe mixes will reflect the 1/2 and 1/2 proportions. Both can be GF as well.
Cindy’s Burrito Mix
This would be the “non-spicy” version. The spicier version basically uses more authentic Mexican spices and a GF Wing sauce rather than the tomato soup.
3/4 lb hamburger
1/2 onion
1/2 cup frozen corn
1 tbsp (15 g) minced garlic
1 can GF tomato soup
1 tbsp (15 g) mustard
1 tsp (5 g) sugar
1 tbsp (5 ml) Worcestershire sauce (GF)
1 tsp (5 g) chili powder
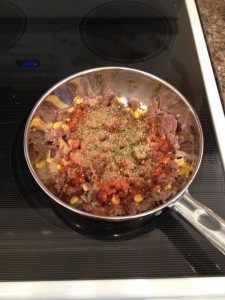
- Cook the hamburger, diced onions, corn and garlic together until done.
- Add in the seasonings mix well and fry up until it’s warm throughout.
Bill’s Burrito Mix
Spicy joy in a pan…
3/4 lb hamburger
1/2 onion
1/2 cup frozen corn
1 tbsp (15 g) minced garlic
1/4 cup (60 ml) Mr. Spice Wing Sauce (GF)
1 tbsp (15 g) cumin
1 tbsp (15 g) cayenne pepper
1 tsp (5 g) cilantro
1 tsp (5 g) garlic
A healthy dash of Habanero Tabasco
- Repeat steps 1-2 found above.
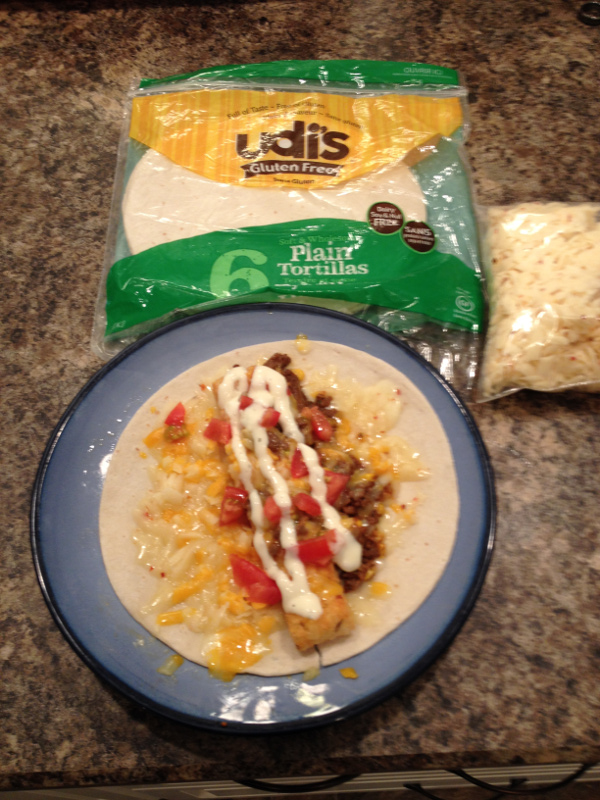
- To make the burrito, I use Udi’s GF Plain Tortillas, layered with shredded Pepper Jack cheese, a row of tater tots (dusted with Lowry’s Seasoning Salt), a row of my burrito mix and finally another layer of marble cheddar. Nuke it to melt the cheese and then add diced tomatoes and ranch.

Pre-rollin’ and lookin’ good!
- Since most GF tortillas are a lot less pliable, you will typically not be able to roll it like a normal burrito and have to do the roll with open ends to be eaten with fork and knife. Oh well, you win some you lose some – I was just glad I found tortillas that didn’t taste like wax paper!
Aug 10, 2014 | Egg Free, Entrees, Nut Free
This is NOT your typical steakhouse faire!
Fair warning – I’m going to generalize here. Every guy loves steak! And the interesting part is every guy has a specific way that they like steak and it almost never can vary in the way that it is prepared. I like steak done a couple of ways, but this one has to be my fave – my Steak Ranchero.
Most self respecting guys will tell you that the best way to cook a steak is over open flame and for it to be eaten with no other garnish than maybe some A-1 or the such. I’m calling bull. I have a friend  of mine who bucked the trend saying that he didn’t like steak much – until he tried mine. It’s all about the prep too.
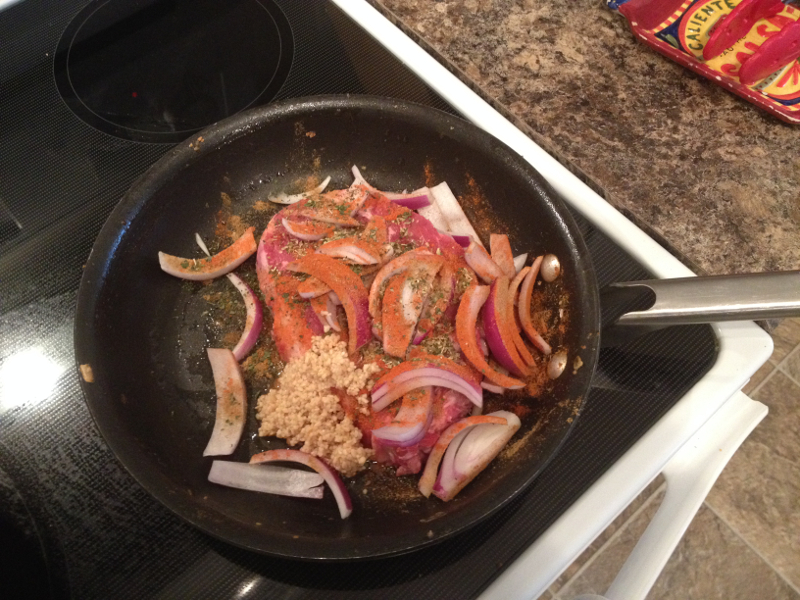
Steak Ranchero
1 large Ribeye
generous helping of Mexican Seasoning and minced garlic
1 red onion
4 oz (125 g) or more of Pepper Jack (or Marble Cheddar)
tomatoes
- Jacard your steak. (A jacard is an instrument of tenderizing that utilizes thin blades in a row that you push down onto the steak. It cuts the tendons in the steak letting the steak breath if you will – in other words, when subjected to heat it won’t clench up.)
- Cook the steak in a frying pan with the onions and seasonings, low and slow. By doing this, the onions will cook in the steak juices and you don’t lose all of that good flavour. And don’t overcook it. Since you Jacarded it, if you overcook it (ie anything over medium) it will be dry, even with the onions.
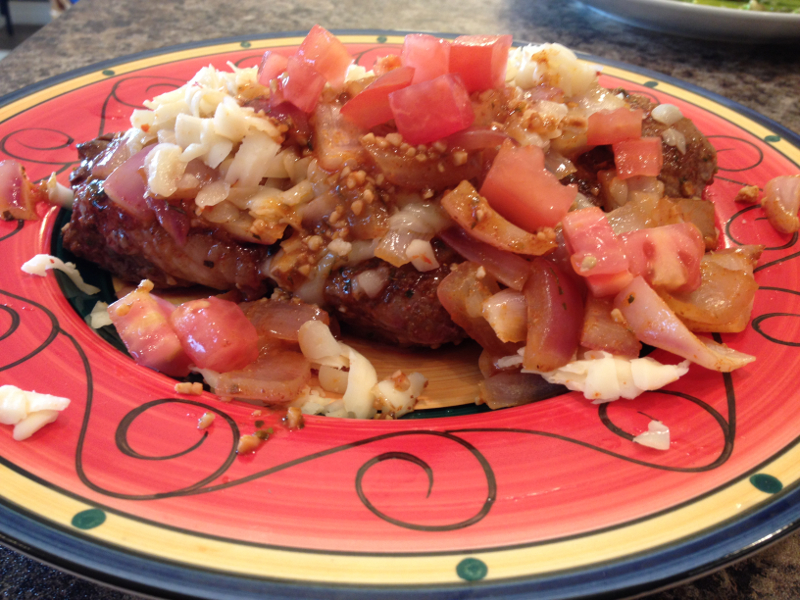
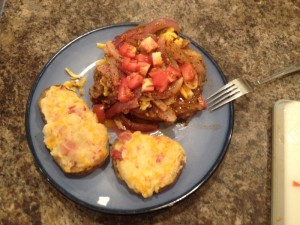 Plate steak, then shredded cheese, fried onions and then diced tomatoes. This steak goes really well with BTBTs!
Remember to shred your own cheese to cover all the GF bases.
Aug 7, 2014 | Egg Free, Nut Free, Side Dishes
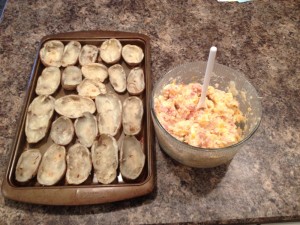
These were done with the non-chilihead in mind – sans red onion, flakes and spicy cheese. Come on – my kids still have to be able to eat what I cook!
Bill’s Twice Baked ‘Taters are a hit pretty much any time I pull ’em out. These baked potatoes are already dressed and fantastic as a side. The only real issue with these is that it takes a fair bit of time to pull ’em off right!
10-12 medium potatoes
1 lb (500 g) bacon
1 large red onion
1 tbsp (15 g) minced garlic
1 tbsp (15 g) red pepper flakes
1 tbsp (15 g) Lowry’s Seasoning salt
8 oz (225 g) or more Pepper Jack cheese
1 cup (250 ml) GF Ranch
- Cook your potatoes. I like to cook them in the oven simply because the skin will get a little tougher and be easier to scrape out – so I do mine at about 350 degrees for about an hour to an hour 20.
- While your taters are cooking, fry your diced bacon and red onion with the flakes, Lowry’s and garlic until the onions are done. If you like your bacon crispy then just use a pre-cooked variety and only saute the onions and spices together in about 2 tbsp of butter.
- While the potatoes and sauteed onions and bacon cool, shred your cheese. Remember to be truly GF, you need to shred your own cheese from a block. Many times, shredded cheese is manufactured with flour used to keep it from freezing together.
- Scrape out the tater innards. Mash together with the bacon and onions in a large bowl, then fully incorporate the cheese and ranch.
- Scoop a heaping portion back into each skin onto a cookie sheet and bake at 350 degrees for about 20 minutes.
As a note, you can use regular marble cheddar and nix the flakes to make it a blander, safer version for those non-chiliheads you might be feeding!