Jul 30, 2014 | Appetizers, Dairy Free, Desserts, Egg Free, Nut Free
I have a number of friends who are bacon fanatics – more so than I. However, I’m not sure how  many of them have tried this delectable and hard to limit treat. The cayenne candied bacon is simple to make and goes great with a ton of stuff as a garnish (read four to five pieces for a sandwich)!
1 lb (500 g) bacon
3 tbsp (45 g) cayenne
1 cup (225 g) brown sugar
- Preheat the oven to 350 degrees F. Line a broiler pan with aluminum foil. Lightly spray the pan.
- Combine the brown sugar and cayenne, stirring to mix well. Press both sides of bacon firmly into the spiced sugar to coat – but shake off excess, don’t press down – a lot will be wasted if you pack it on. Arrange the slices of bacon on top of the broiler rack in a single layer, sugared-side up. If there is any sugar remaining in the dish, sprinkle it on top of the bacon slices evenly.
- Bake until the bacon is crisp and the sugar is bubbly, 15 minutes. Transfer to cookie racks to drain briefly, then to a plate or serving dish to cool.
Jul 29, 2014 | Musings
The world lost a very funny man earlier this year – comedian John Pinette. While John died due to complications from heart and liver disease, he was also allergic to gluten. And at one point, he did a bit about it. It was quite funny and I thought worth sharing since his reaction was about the same as mine when I found out I had Celiac’s.
Check it out … John Pinette – Gluten.
Jul 27, 2014 | Desserts, Nut Free
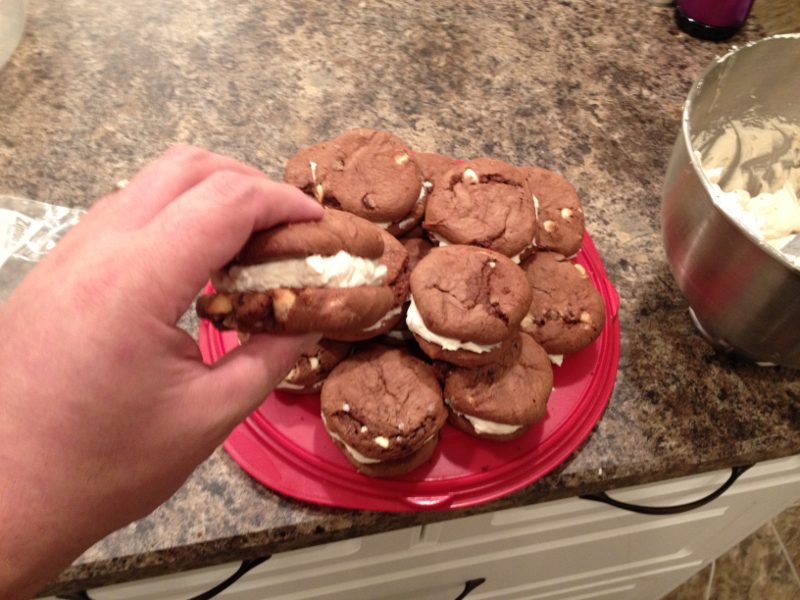
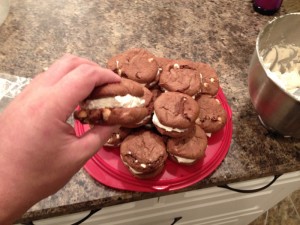 These cookies are full of chocolate, have a bit of caffeine and if you don’t watch it, will have you wired for sound! The cookie sandwiches feature a double chocolate (white and milk) chocolate coffee-flavoured cookie with a white chocolate frosting middle.
Creamed Coffee Cookie
For the cookies, I try to do as little extraneous work as possible. If you want to sift your flour and sugars, mixing dry together first and then wet – go for it. I like the one mixer, wet first, then dry and away we go!
1 cup (250 g) butter @ room temp
3/4 cup (180 g) sugar
3/4 cup (180 g) brown sugar
3 tbsp (45 g) Kahlua
3 large eggs
2 tbsp (30 ml) vanilla
2 cups flour (480 g), GF of course
1/2 cup (125 g) cocoa powder
1 tsp (5 g) baking soda
1 tsp (5 g) salt
2 small bags (450 g) white chocolate chips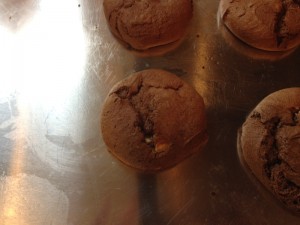
- After you’ve preheated your oven to 350 degrees, cream your butter and the sugar – remembering to scrape the sides to fully incorporate everything.
- Add the eggs, vanilla and Kahlua – mix well.
- Add the flour, cocoa powder, baking soda and salt – mix well.
- Incorporate the chocolate chips.
- Scoop them with a medium to small cookie scoop and bake at 350 – I do convection for about 15 minutes. Non-convection would be about 17-18 minutes.
The cookies will have almost a cake like consistency from the batter to the end result with them puffing up and then flattening after they cool. But they should be super-moist. Wait for them to cool and start working on your white chocolate frosting. Note: if you don’t want to use Kahlua, you could use about 3-4 tbsp of espresso powder. It will have a stronger coffee flavour then.
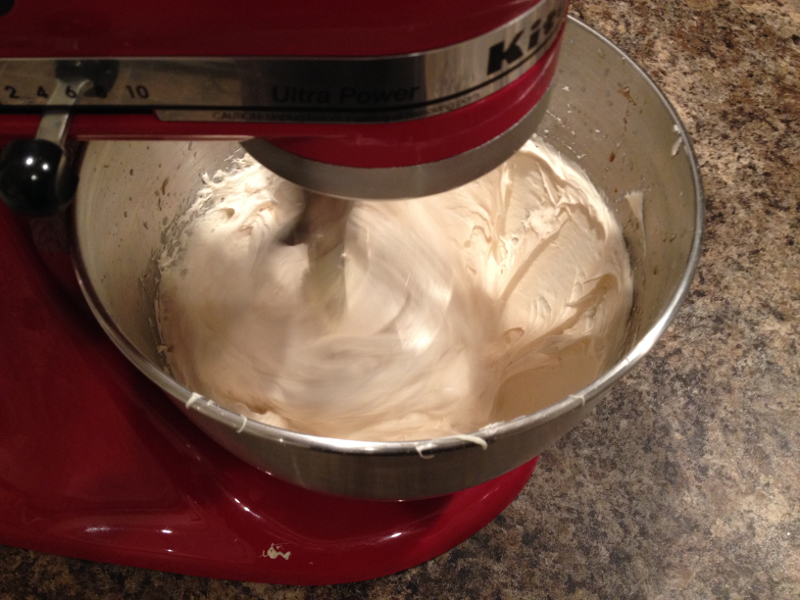
Frosting
1 cup butter
1 cup white chocolate chips
2 cups icing sugar
1/4 cup milk
2 tbsp vanilla
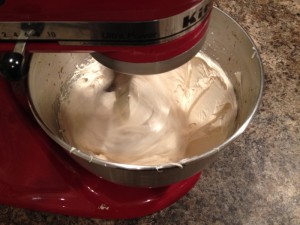
- Cream the butter in your clean stand mixer.
- While the butter works, microwave your chips in a bowl with a plate over the top for 30 seconds, stir, and repeat twice. Don’t microwave them all at once or don’t overcook them. If you notice the chips are melting and completely turn into a paste then don’t microwave them anymore.
- Add the sugar to the butter, beating until incorporated.
- Add the milk and the vanilla, beating together. At this point you will notice it should look almost wet and clumpy.
- Add in your melted white chocolate and beat it well. It should firm up into nice smooth frosting.
You can frost the cookies immediately or let the frosting cool in the fridge if you want it firmer. I like to do it immediately because it’s pliable and will firm up in between the cookies in the fridge once the sandwiches are complete!
Note: I have not tried this, but if you are brave enough, you could add a little cayenne to the cookies to spice them up. Every batch I’ve made of these sandwiches thus far have been for mixed company – so let me know what you think and how much you added to give it that extra zing!
Jul 21, 2014 | Appetizers, Egg Free, Nut Free
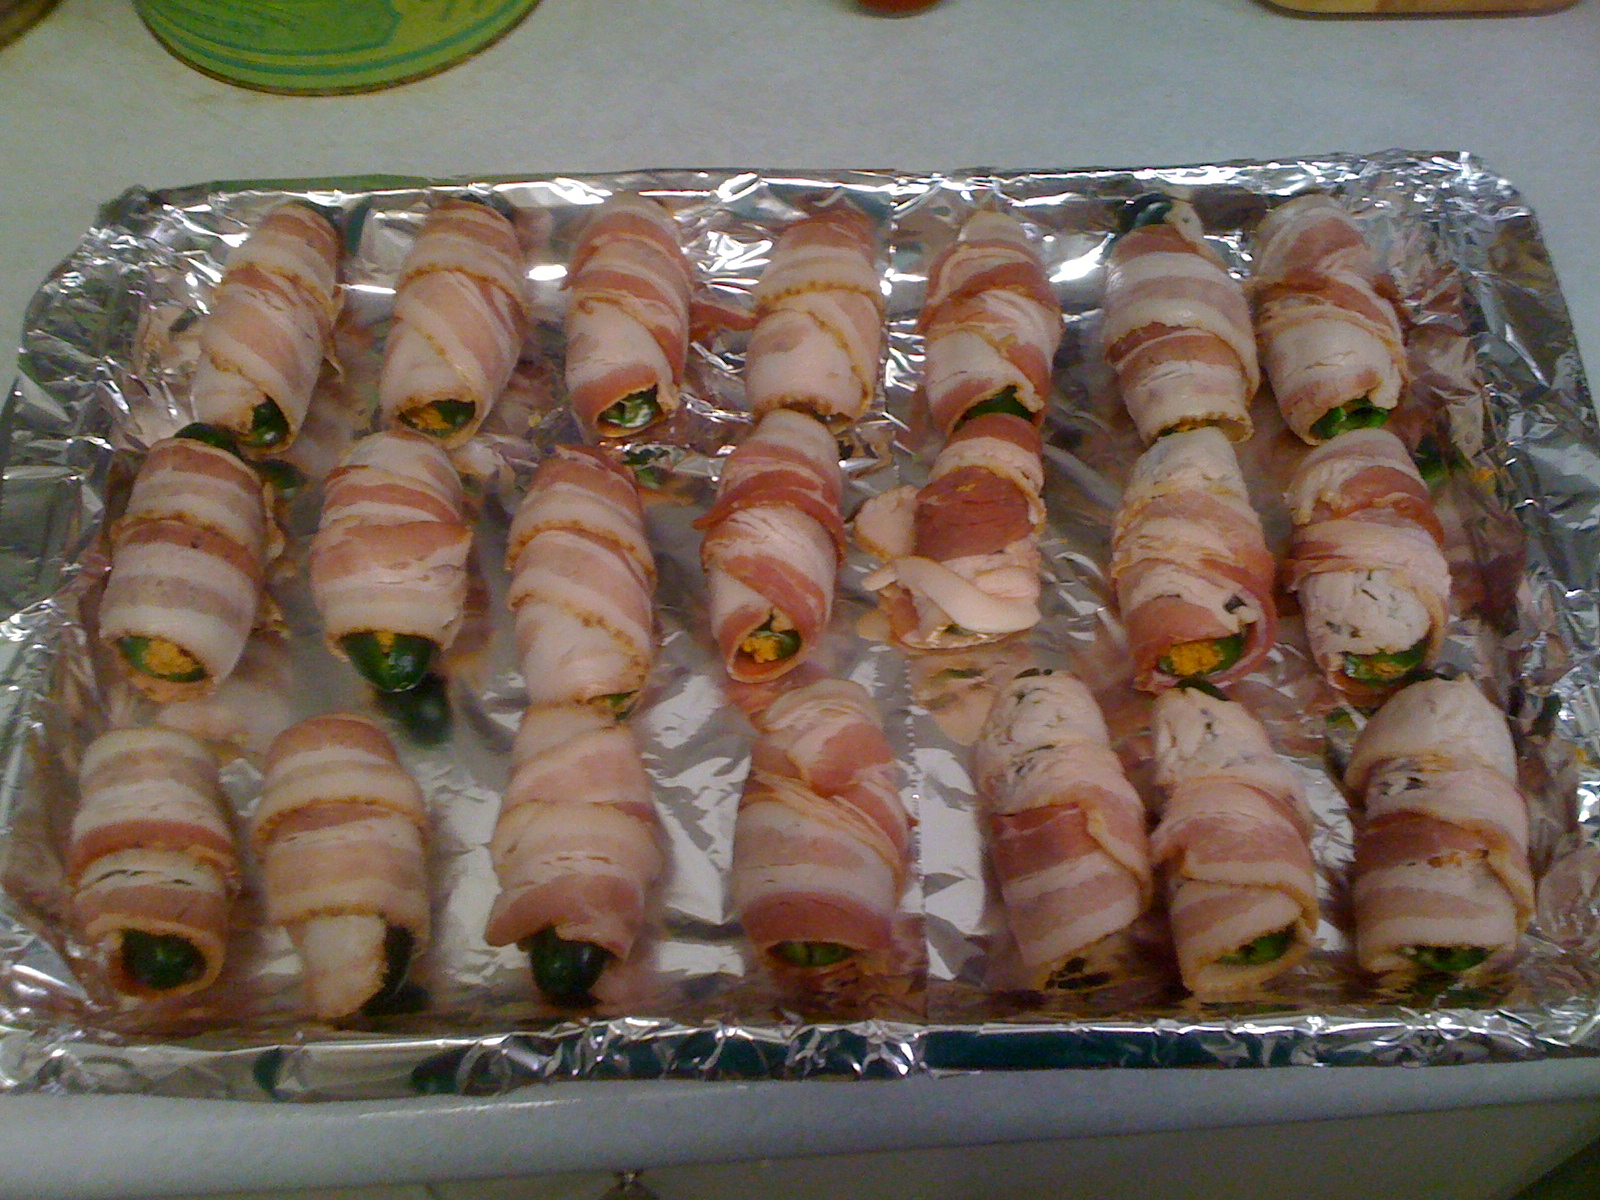
I came up with this one as a Relay for Life fundraiser in Beulah, ND. And it grew in infamy from there – I’ve done it a few times and most of everyone is salivating just at the mention of them.
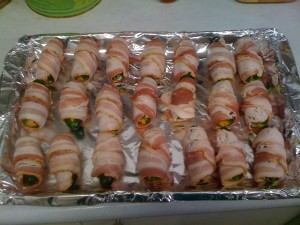
These were for baking.
8 oz. (250 g) cream cheese
8 oz. (225 g) pepper jack cheese
2 tbsp (30 g) minced garlic
1/4 cup (60 g) sun-dried tomatoes
1 tbsp (15 g) cilantro
25 large jalapeno peppers
1 lb (500 g) thin slice bacon
- Mix room temperature cream cheese and shredded pepper jack with garlic, finely chopped sun-dried tomatoes and cilantro. The stuffing should be soft and manageable enough to squeeze out of a pastry bag or a Ziploc bag with a corner cut off.
- Slice each jalapeno lengthwise on one side, being careful not to cut the jalapeno in half. Stuff the pepper with the mixture making sure not to overfill the jalapeno.
- Wrap each pepper with two strips of bacon, which should secure the opening. Slide a number of wrapped peppers onto a long wood skewer with a little space in between each pepper.
- The stuffed pepper can either be grilled or baked. It is best to soak your skewers in a little olive oil before using them on the grill or in the oven. This will prevent them from charring.
- To bake the peppers, the oven should be at about 400 degrees and it should take about 20 minutes. To grill the dragon bites, make sure the bacon is done. And if you grill them, you might want something under them, such as foil or a foil pan since they will be messy.
Jul 19, 2014 | Egg Free, Entrees, Nut Free
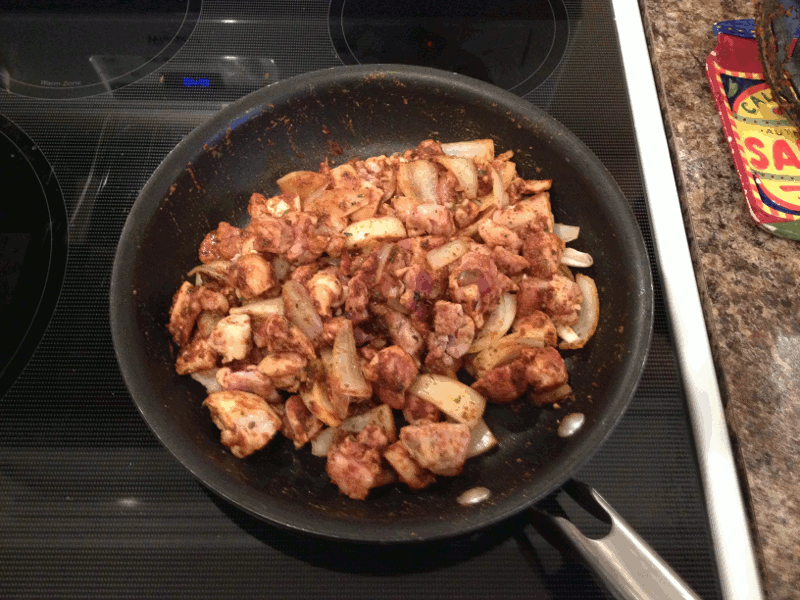
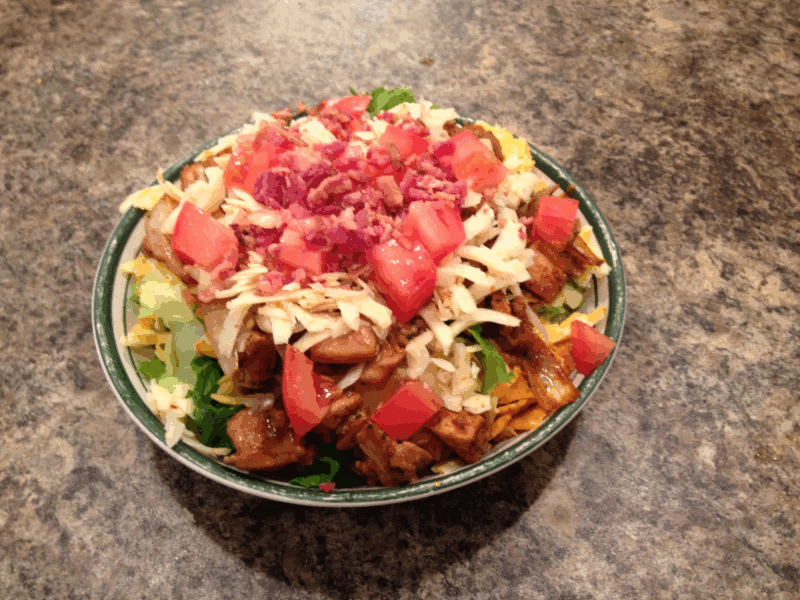
I’m a sucker for the restaurant-style meal salads and this one is one of my favourite incarnations. You can make it as spicy as you want and there’s little to no chance of being glutenized with this one.

I usually like to use red onions, but this version was for the kids and I – hence the more tame yellow onions.
Recipe
2-3 BLSL thighs
Red onions
Liberal helping of Tex-Mex Taco Seasoning
Doritos – I prefer the Jalapeno & Cheddar variety
Pepper Jack cheese
Tomatoes
Bacon bits
Romaine lettuce
- Cook your cubed thighs with the julienned red onions and seasoning
- Layer Romaine, crushed chips, shredded cheese, chicken, diced tomatoes and bacon bits
If you’re like me, you go really heavy on the cheese with potentially two layers. And if you’re adventurous, you could add avocado slices. As for salad dressings, you could do Ranch or Kraft has a Sun-Dried Tomato and Oregano salad dressing that is really good.

Finished product sans dressing
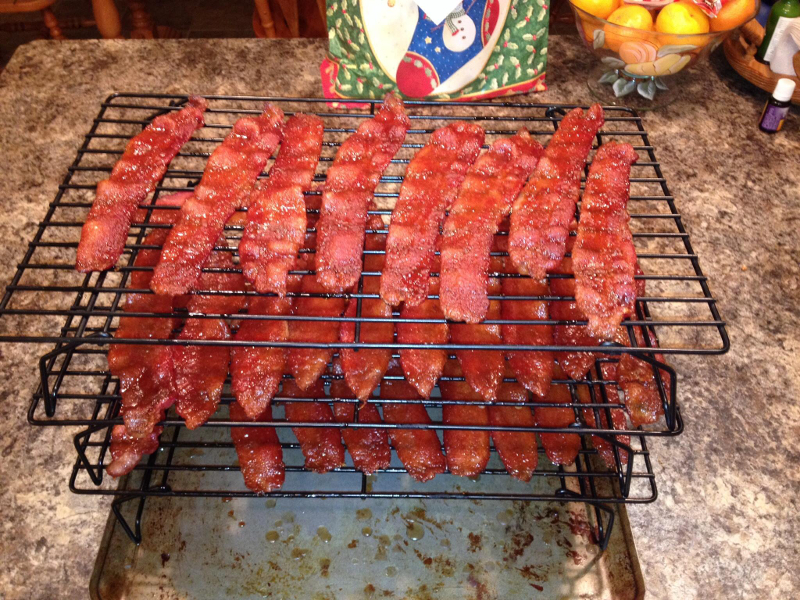 many of them have tried this delectable and hard to limit treat. The cayenne candied bacon is simple to make and goes great with a ton of stuff as a garnish (read four to five pieces for a sandwich)!